EN
EN  LV
LV RU
RU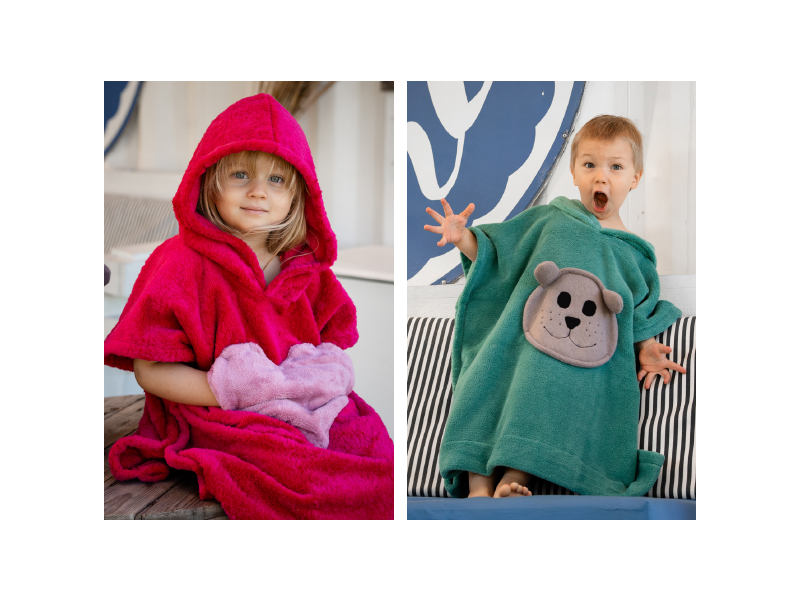
PONCHO
FOR SIZES 92–140 CM
COMPLEXITY LEVEL: *

Poncho is a comfortable garment that can be easily and conveniently thrown on. Poncho is versatile and comfortable, perfect for playing on the beach or relaxing at home. Come and discover with us the tutorial compiled by Piret Mellik on how to make a fun children's poncho yourself. Allow the kids to enjoy the summer to the fullest in style and comfort!
This is one of many guides on how to make childrens clothes from Piret's book "Lasteriiete õmblemine".
Material Consumption Table
|
Size (cm) |
92–104 |
110–122 |
128–140 |
|
|
Title |
Description |
Material Consumption |
||
|
Main Material |
T-shirt fabric, terry, fluffy fleece, or other soft and comfortable knit fabric |
1,2 m |
1,3 m |
1,4 m |
|
Additional Material |
Knit fabric that matches the main material (furry); optionally, a bit of batting for the ears |
0,3 m |
0,3 m |
0,3 m |
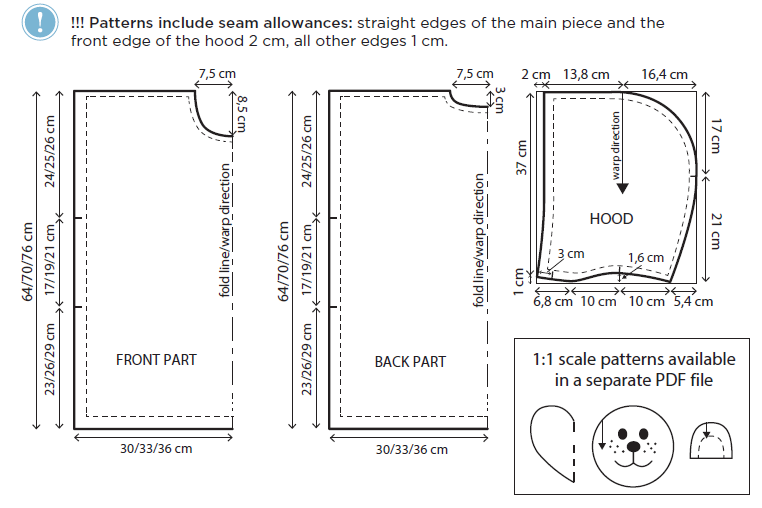
1:1 scale patterns HERE!
|
Detail name |
Material |
Cutting Order |
|
Hood |
Main Material |
1 pair |
|
Front Part |
Main Material |
1 |
|
Back part |
Main Material |
1 |
|
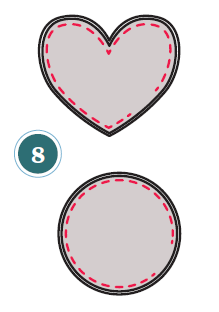
“Heart” Pocket * |
Additional Material |
1 pair |
|
“Bear” Pocket ** |
Additional Material |
1 pair |
|
Ear *** |
Additional Material |
2 pairs / 4 pairs |
*Cut if you want a heart-shaped pocket.
**Cut if you want a round pocket.
***Cut if you want ears on the hood/pocket.
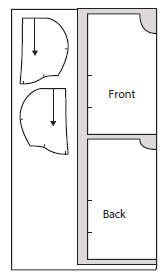
Layout of Details on Fabric:
Recommendation for placing patterns on the main material for sizes 92–140 cm, fabric width 140 cm
PROCESS
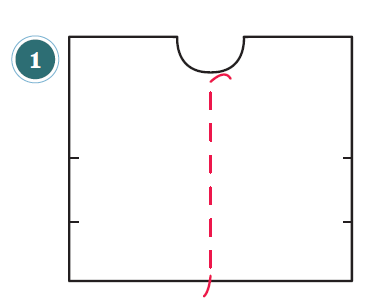
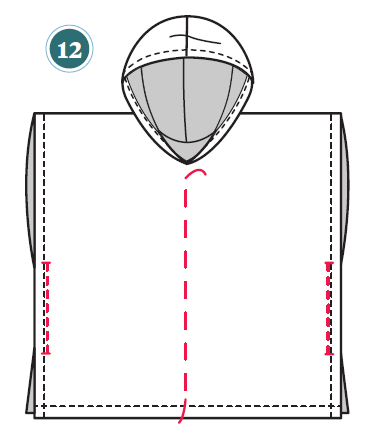
MARKING THE FRONT CENTER LINE
-
Mark the front center line with a long basting stitch – this makes it easier to place the pocket on the front part later.

SEWING SHOULDER SEAMS
-
Place the front and back pieces right sides together, aligning the shoulder lines.
Sew the shoulder seams, seam allowance 1 cm.
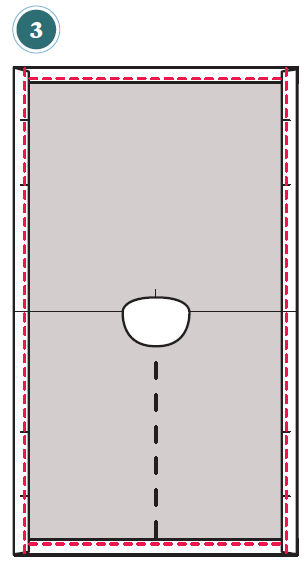
HEM THE MAIN DETAIL'S EDGES
-
If you have chosen a fabric that frays or sheds from the edges, hem the straight edges of the main piece immediately after cutting it out.
Turn the seam allowance of the shorter edges of the main piece (2 cm) to the wrong side and secure with a basting stitch.
Then, turn the seam allowance of the longer edges of the main piece (2 cm) to the wrong side and secure with a basting stitch.
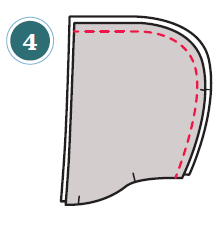
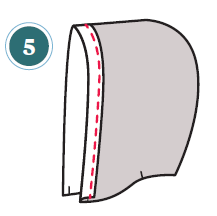
SEWING THE HOOD
-
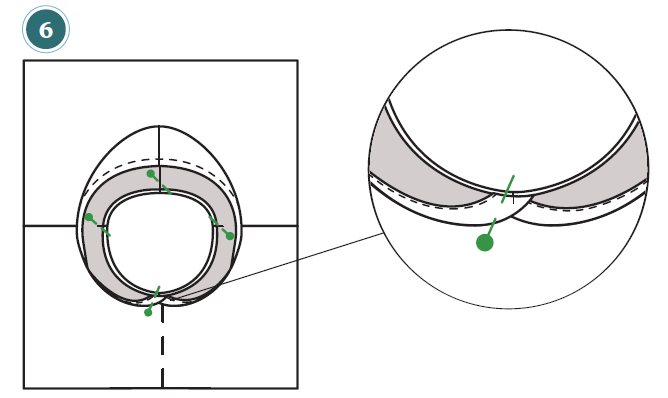
Place the hood pieces right sides together and join them along the curved edge.
-
Turn the front edge of the hood's seam allowance (2 cm) to the wrong side and secure the edge with a basting stitch.
-
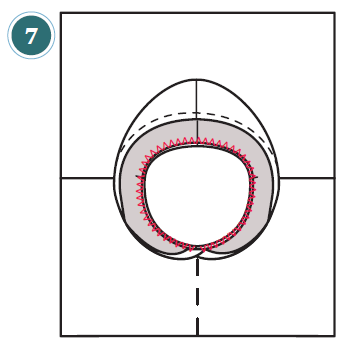
Place the hood in the neckline, right sides together. The back seam of the hood aligns with the center back line of the main piece, and the hood's opposite marks align with the main piece's opposite marks; the front edges of the hoods overlap at the center front line.
-
Sew the hood to the neckline, seam allowance 1 cm.
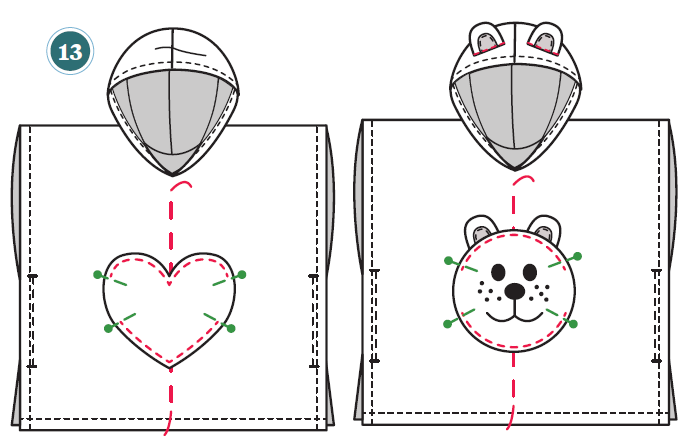
SEWING THE POCKET (BOTH POCKET VARIANTS SHOWN IN THE DRAWING, CHOOSE THE ONE YOU PREFER)
-
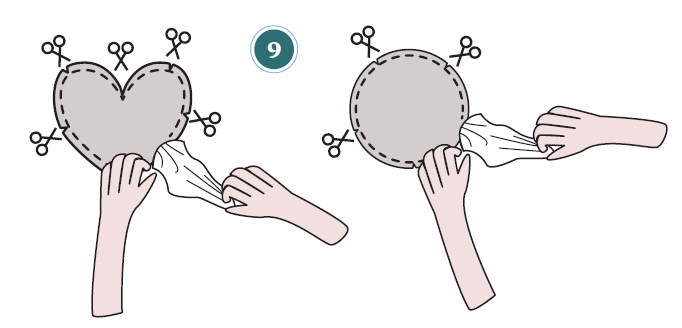
Place the pocket parts right sides together and join the edges, leaving about a 5 cm opening.
-
Clip (cut lines into the seam allowences) the seam allowances in the curved parts and turn the right side of the pocket out through the opening.
SEWING/DRAWING/EMBROIDERING BEAR FACE ON POCKET
-
Sew with zigzag stitches, draw or embroider the bear's face lines on the pocket.
You can cut the eyes and nose from fabric and sew them on the pocket with zigzag stitches.
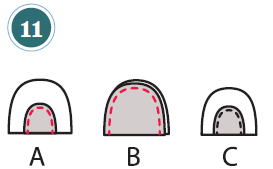
SEWING BEAR EARS
-
If desired, sew a small inner part to the lower edge of the ear (A).
Place the ear parts right sides together and join at the top edge, seam allowance 1 cm (B).
Turn the right side of the ear out and optionally stuff with a bit of batting (C).
You can attach ears to the hood, the pocket, or both.
SEWING SIDE SEAMS
-
Lay the front and back parts on top of each other, wrong sides facing.
Mark the location of the side seams according to the pattern and join the side seam about 2 cm from the edge (from the existing basting line).
!!! Make small (about 1 cm long) securing stitches at the ends of the seam to prevent the side seams from tearing during wear.
SEWING THE POCKET ONTO THE FRONT PART
13. try on the poncho and place the pocket at a sutable height on the front part (the center line of the pocket aligns with the center line of the front part).
Mark the length of the pocket openings comfortable for the hands with pins.
For the bear pocket, place the ears at the top part under the pocket edge.
Sew the pocket to the front part, leaving the pocket openings unsewn, and make short back- and-forth stitches at the ends of the seams.
If you wish, attach ears to the hood, sewing them manually in a suitable place on the hood.